Sharing how I'm enjoying the best days of my life, after decades of chronic illness, by living as a vegan, and keeping my mind, body and spirit healthy and flowing with the highest vibrations.
February 18, 2018
It's time to plant seeds
The Moon is waxing, I've been sowing seeds once again. I was waiting for the Moon to be in Pisces, being a water sign, it's the best time to plant seeds. π±π°π±π°π±
This is also the best time to plant growth seeds in our own lives. Keeping our minds, bodies and actions focused on the positives in life, what feels good and helps us to feel good, propells us towards contentment and happiness in our every day. I believe, if we do this work for ourselves, the results will filter through to the rest of the world, making it a better place to live for every living soul. ππππΌπππΌπ
π±ππππ± Sarah
Mini Pizza - Vegan - Gluten Free
When we were growing up, my sister and I used to make mini pizzas on the weekends, I still love to eat them now. I use Enzo's gluten free bread(toasted, it makes a fabby crust), with Green Vie Vegan Mozarella (both available from She's Apples in Australia), my tomato sauce (fresh tomatoes, garlic, onions, herbs simmered down and bottled), mushrooms, olives and pineapple. So yum! It feels crazy to me to feel this good and this energised after eating pizza! The limited fat content from plant foods keeps my blood sugar rise predictable, which makes it easier to bolus for type 1. I'm so grateful, pizza is one of top things I craved after getting celiacs and giving up meat and dairy nearly 5 years ago. Woo hoo, I love food, I love eating and I love choosing to only eat plant foods π±ππππππππππ±
π±ππππ± Sarah
October 22, 2017
Bliss Balls - Vegan - Gluten Free
Bliss Balls!! Truly, these are a blissful treat and packed with nutrition! They have the full range of amino acids we need for our body to make proteins, B vitamins, copper, magnesium, manganese, iron, zinc, vitamin K, vitamin E, omega 3 fatty acids...the list goes on. This is a super easy, and delicious way to bump up our nutrients for the day. So easy to snack on.
I use Cronometer daily to see that I'm meeting my nutritional needs, it is also a great way to add my full recipe details and find out nutritional information for portion sizes, and to find out information on specific foods too. Here is a clip of the nutrition of 1 bliss ball! Yes, only 1. Plant food is amazing isn't it!
Ready to make bliss balls?
Start by grinding
1 cup of almonds
2 cups of cashews
in the food processor.
Then add
2 cups of dates
1 cup shredded coconut
1/2 cup flaxmeal
2/3 cup cashew milk
1 tsp vanilla extract
1 tsp salt
1 tsp cinnamon
blend in the food processor until sticky
and roll into balls.
Keep in the fridge for a few days, or freeze them to last longer and have on hand for a tasty treat.
Makes about 30 balls.
Yum! Enjoy!
October 18, 2017
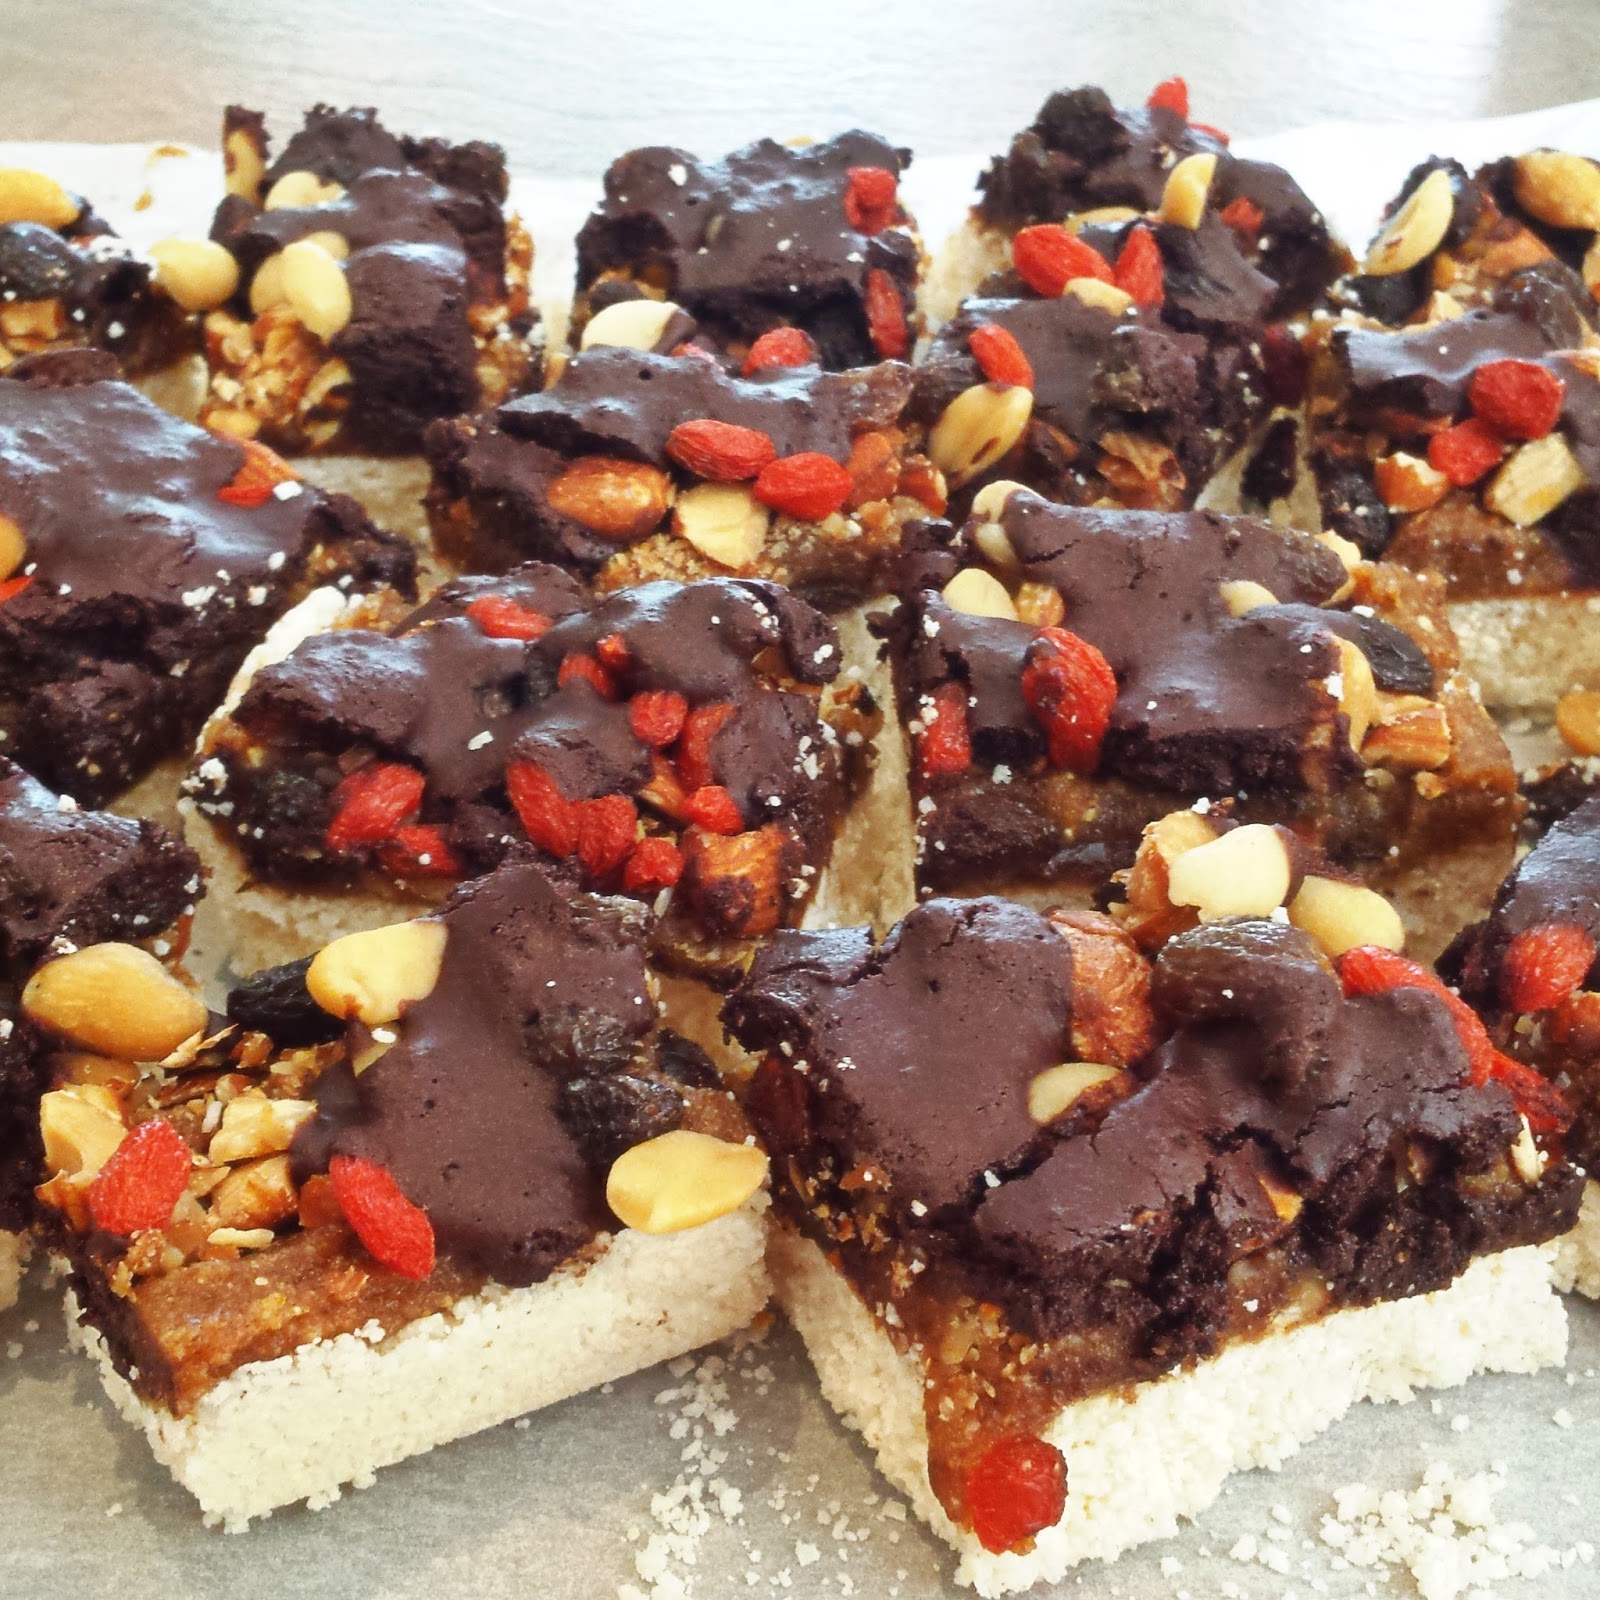
My Favourite "Chocolate Bar" Slice - Vegan - Gluten Free
So, are you ready? Let's begin....
In the processor, place
4 cups shredded coconut
1 tsp vanilla extract
1/2 tsp salt
4 tbsp maple syrup
(depending on the moisture content of the coconut, a splash of nut milk can be added right at the end, only if needed)
Give this a mix in the food processor until its is finely ground and sticks together between your fingers, about 3 -4 minutes. Then, press down into a prepared 25 cm square, lined, baking tray.
Now for the toffee fudge...
2 cups cashews
1 cup dates (if dried, briefly soaked, 30 mins in warm water and drain)
1 tsp vanilla extract
1/2 tsp salt
Blend this until it comes together and forms a nice smooth consistency. Spread out on top of the coconut base.
Sprinkle nuts and dried fruit on top. I like to use,
1/2 cup chopped almonds (quick blitz in food processor will do this)
1/2 cup peanuts
1/2 cup sultanas
1/2 cup gogi berries
Time for the chocolate...mmmm!
In a small bowl add,
4 Tbsp maple syrup
4 Tbsp cacao powder
1/2 tsp salt
1 tsp vanilla extract
2 Tbsp cashew nut milk
Drizzle this on the top of your slice.
Doesn't that look delicious!! Don't cut into it yet, lightly cover with the excess baking paper, without pressing down onto chocolate (alternatively, use cling wrap) and place it in the fridge overnight, ready to slice up the next day.
Pull it out of the tin using the lining, and slice up with a sharp knife.
For those who can't wait (ME!) Put it in the fridge for a few hours, or freezer for 1 hour and you can lift the whole slice out gently with the baking paper lining, then cut some from the side and enjoy, before replacing back into the pan...and letting it set properly (it'll never know, -sneaky hehe!)
Hope you like, x Sarah
October 6, 2017
Lemon Tart - Vegan - Gluten Free
This lemon tart was something of a trial, when I was a non-vegan, I used to love lemon tart and lemon meringue pie, but never really enjoyed the egg taste of the original recipe. So, I am delighted to find I can make a fresh tasting, healthy, Vegan and Gluten Free version of one of my favourites!
Let's begin with the base.
In the food processor grind the almonds into crumbs, then add in the dates, vanilla and salt.
1 cup ground almonds
1 cup soaked dried dates (1 hour soak time)
1 tsp vanilla essence
1/2 tsp salt
Press into a 20 cm lined pie dish and chill in the fridge while we prepare the delicious lemon filling.
For that we will need a medium sized saucepan and a spatula to stir.
Into the saucepan, place all the ingredients and before heating, whisk in the tapioca flour with a fork. Place on medium heat and let it thicken and cook, it doesn't take too long, about 10 minutes.
1/2 cup lemon juice
1 tbsp lemon zest
2 cups cashew milk (or nut milk of choice)
1 tsp vanilla extract
6 tbsp maple syrup
1/3 cup tapioca flour
Pour on top of the pie crust and place in the fridge until set. I found this to have a better flavour the next day. I am also now a convert of tapioca! Amazing stuff!
Enjoy!!
x Sarah
Let's begin with the base.
In the food processor grind the almonds into crumbs, then add in the dates, vanilla and salt.
1 cup ground almonds
1 cup soaked dried dates (1 hour soak time)
1 tsp vanilla essence
1/2 tsp salt
Press into a 20 cm lined pie dish and chill in the fridge while we prepare the delicious lemon filling.
Into the saucepan, place all the ingredients and before heating, whisk in the tapioca flour with a fork. Place on medium heat and let it thicken and cook, it doesn't take too long, about 10 minutes.
1/2 cup lemon juice
1 tbsp lemon zest
2 cups cashew milk (or nut milk of choice)
1 tsp vanilla extract
6 tbsp maple syrup
1/3 cup tapioca flour
Pour on top of the pie crust and place in the fridge until set. I found this to have a better flavour the next day. I am also now a convert of tapioca! Amazing stuff!
Enjoy!!
x Sarah
September 29, 2017
Peanut Crunch Biscuits - Vegan - Gluten Free
I love peanuts!! Peanut butter, even better! I slather it on everything, and although most people will be thinking, "fat! calories!" I have gained no weight with my peanut obsession whilst on my plant based diet. Peanuts have so much nutrition, more protein per weight than meat, and it is a plant food, so NO cholesterol. In fact, I eat about one jar of peanut butter per week and my cholesterol had dropped by 2 points after 6 months of going fully plant based and giving up eggs, the last animal product I was consuming.
Enjoy nuts! I'm able to build up muscle and strength, consistently, that I was never able to build up on animal protein.
Ingredients
1 cup ground cashews
1/2 cup ground almonds
1/2 cup coconut flour
6 tbsp maple syrup
2 heaped tbsp peanut butter
1 tsp vanilla extract
pinch salt (if using salted peanuts, omit this)
1/4 cup nut milk
2/3 cup peanuts (mixed through at the end so they are not too broken up by the mixer blades)
Let's get baking!
Place the cashews, almonds, and coconut flour in the food processor and grind to a fine flour for approximately 1 minute
Add everything else, except the whole peanuts. Blend until it is combined and almost at dough stage.
Add the peanuts now and give the food processor another wiz for about 10, until the peanuts are broken up a little, and the dough starts to form.
Roll out spoonfuls of the dough between your hands, press down into a biscuit shape (they will not spread in the oven) and place on the prepared flat biscuit tray.
Bake in a preheated oven 160 Celsius for approximately 20 minutes depending on the size of your biscuits. I made 12 largish biscuits.
Of course, they smell delicious baking in the oven...yum! Enjoy!!!
x Sarah
Enjoy nuts! I'm able to build up muscle and strength, consistently, that I was never able to build up on animal protein.
So, here is my peanut crunch biscuit recipe! Very easy to make in the food processor, and eat....
Ingredients
1 cup ground cashews
1/2 cup ground almonds
1/2 cup coconut flour
6 tbsp maple syrup
2 heaped tbsp peanut butter
1 tsp vanilla extract
pinch salt (if using salted peanuts, omit this)
1/4 cup nut milk
2/3 cup peanuts (mixed through at the end so they are not too broken up by the mixer blades)
Let's get baking!
Place the cashews, almonds, and coconut flour in the food processor and grind to a fine flour for approximately 1 minute
Add everything else, except the whole peanuts. Blend until it is combined and almost at dough stage.
Add the peanuts now and give the food processor another wiz for about 10, until the peanuts are broken up a little, and the dough starts to form.
Roll out spoonfuls of the dough between your hands, press down into a biscuit shape (they will not spread in the oven) and place on the prepared flat biscuit tray.
Bake in a preheated oven 160 Celsius for approximately 20 minutes depending on the size of your biscuits. I made 12 largish biscuits.
Of course, they smell delicious baking in the oven...yum! Enjoy!!!
x Sarah
September 27, 2017
Carrot Cake - Vegan - Gluten Free - Raw
Carrot cake is one of my families favourites! It's so good to be able to make a healthy, vegan and gluten free version we can all enjoy. It is also raw, so extremely easy to make, especially if you have a food processor. You won't believe how good this tastes and how similar it is to the real thing.
My Carrot Cake Recipe
I use my food processor for easy grating and mixing,
Ingredients...
1 cup shredded coconut
1/2 tsp salt
1 tsp cinnamon
1 cup soaked dates
1 cup walnuts - leave out until the end (I rinse these first to wash the bitter taste away)
Mix everything in the food processor until combined except the walnuts, the mix should still be a little chunky, then add the walnuts and give a quick, 10 second mix, so they aren't pulverised and unrecognisable in the cake. Spoon out into a lined 20 cm long, loaf pan.
For the Maple Cream -
2 Tbsp Maple Syrup
Juice and zest of half a lemon
1 tsp vanilla extract
Blend this together in the food processor and then spread on the top of the carrot cake. Sprinkle with some extra cinnamon if you like.
Place this in the fridge for about 3 hours or freezer for 1 before lifting it out using the lining, slice it up and enjoy.
Sarah x
My Carrot Cake Recipe
Ingredients...
For the cake
2 cups of grated carrot (about 4 medium carrots (I use the medium size grater attachment on my food processor)1 cup shredded coconut
1/2 tsp salt
1 tsp cinnamon
1 cup soaked dates
1 cup walnuts - leave out until the end (I rinse these first to wash the bitter taste away)
For the Maple Cream -
1 can coconut cream (scrape out the cream from the top and drain off the water)
Juice and zest of half a lemon
1 tsp vanilla extract
Place this in the fridge for about 3 hours or freezer for 1 before lifting it out using the lining, slice it up and enjoy.
I found the flavours to be nicer on the second day, so if you are going to freeze this, make sure you store it in the fridge for at least 24 hours before you do.
I hope you enjoy!Sarah x
Subscribe to:
Posts (Atom)